Tag Archives: CSIA Certified Chimney Sweep

Levels of Chimney Inspections

A microscope on top of a cut-out house with the focus on the chimney

In 2000, the National Fire Protection Agency, otherwise known as NFPA, addressed chimney inspections. The NFPA established three levels of inspection–Level 1, Level 2 and Level 3. This three-tiered system of chimney inspections can be confusing to homeowners, real estate agents, and even home inspectors. This is a brief explanation to clarify this important subject.

Home inspections

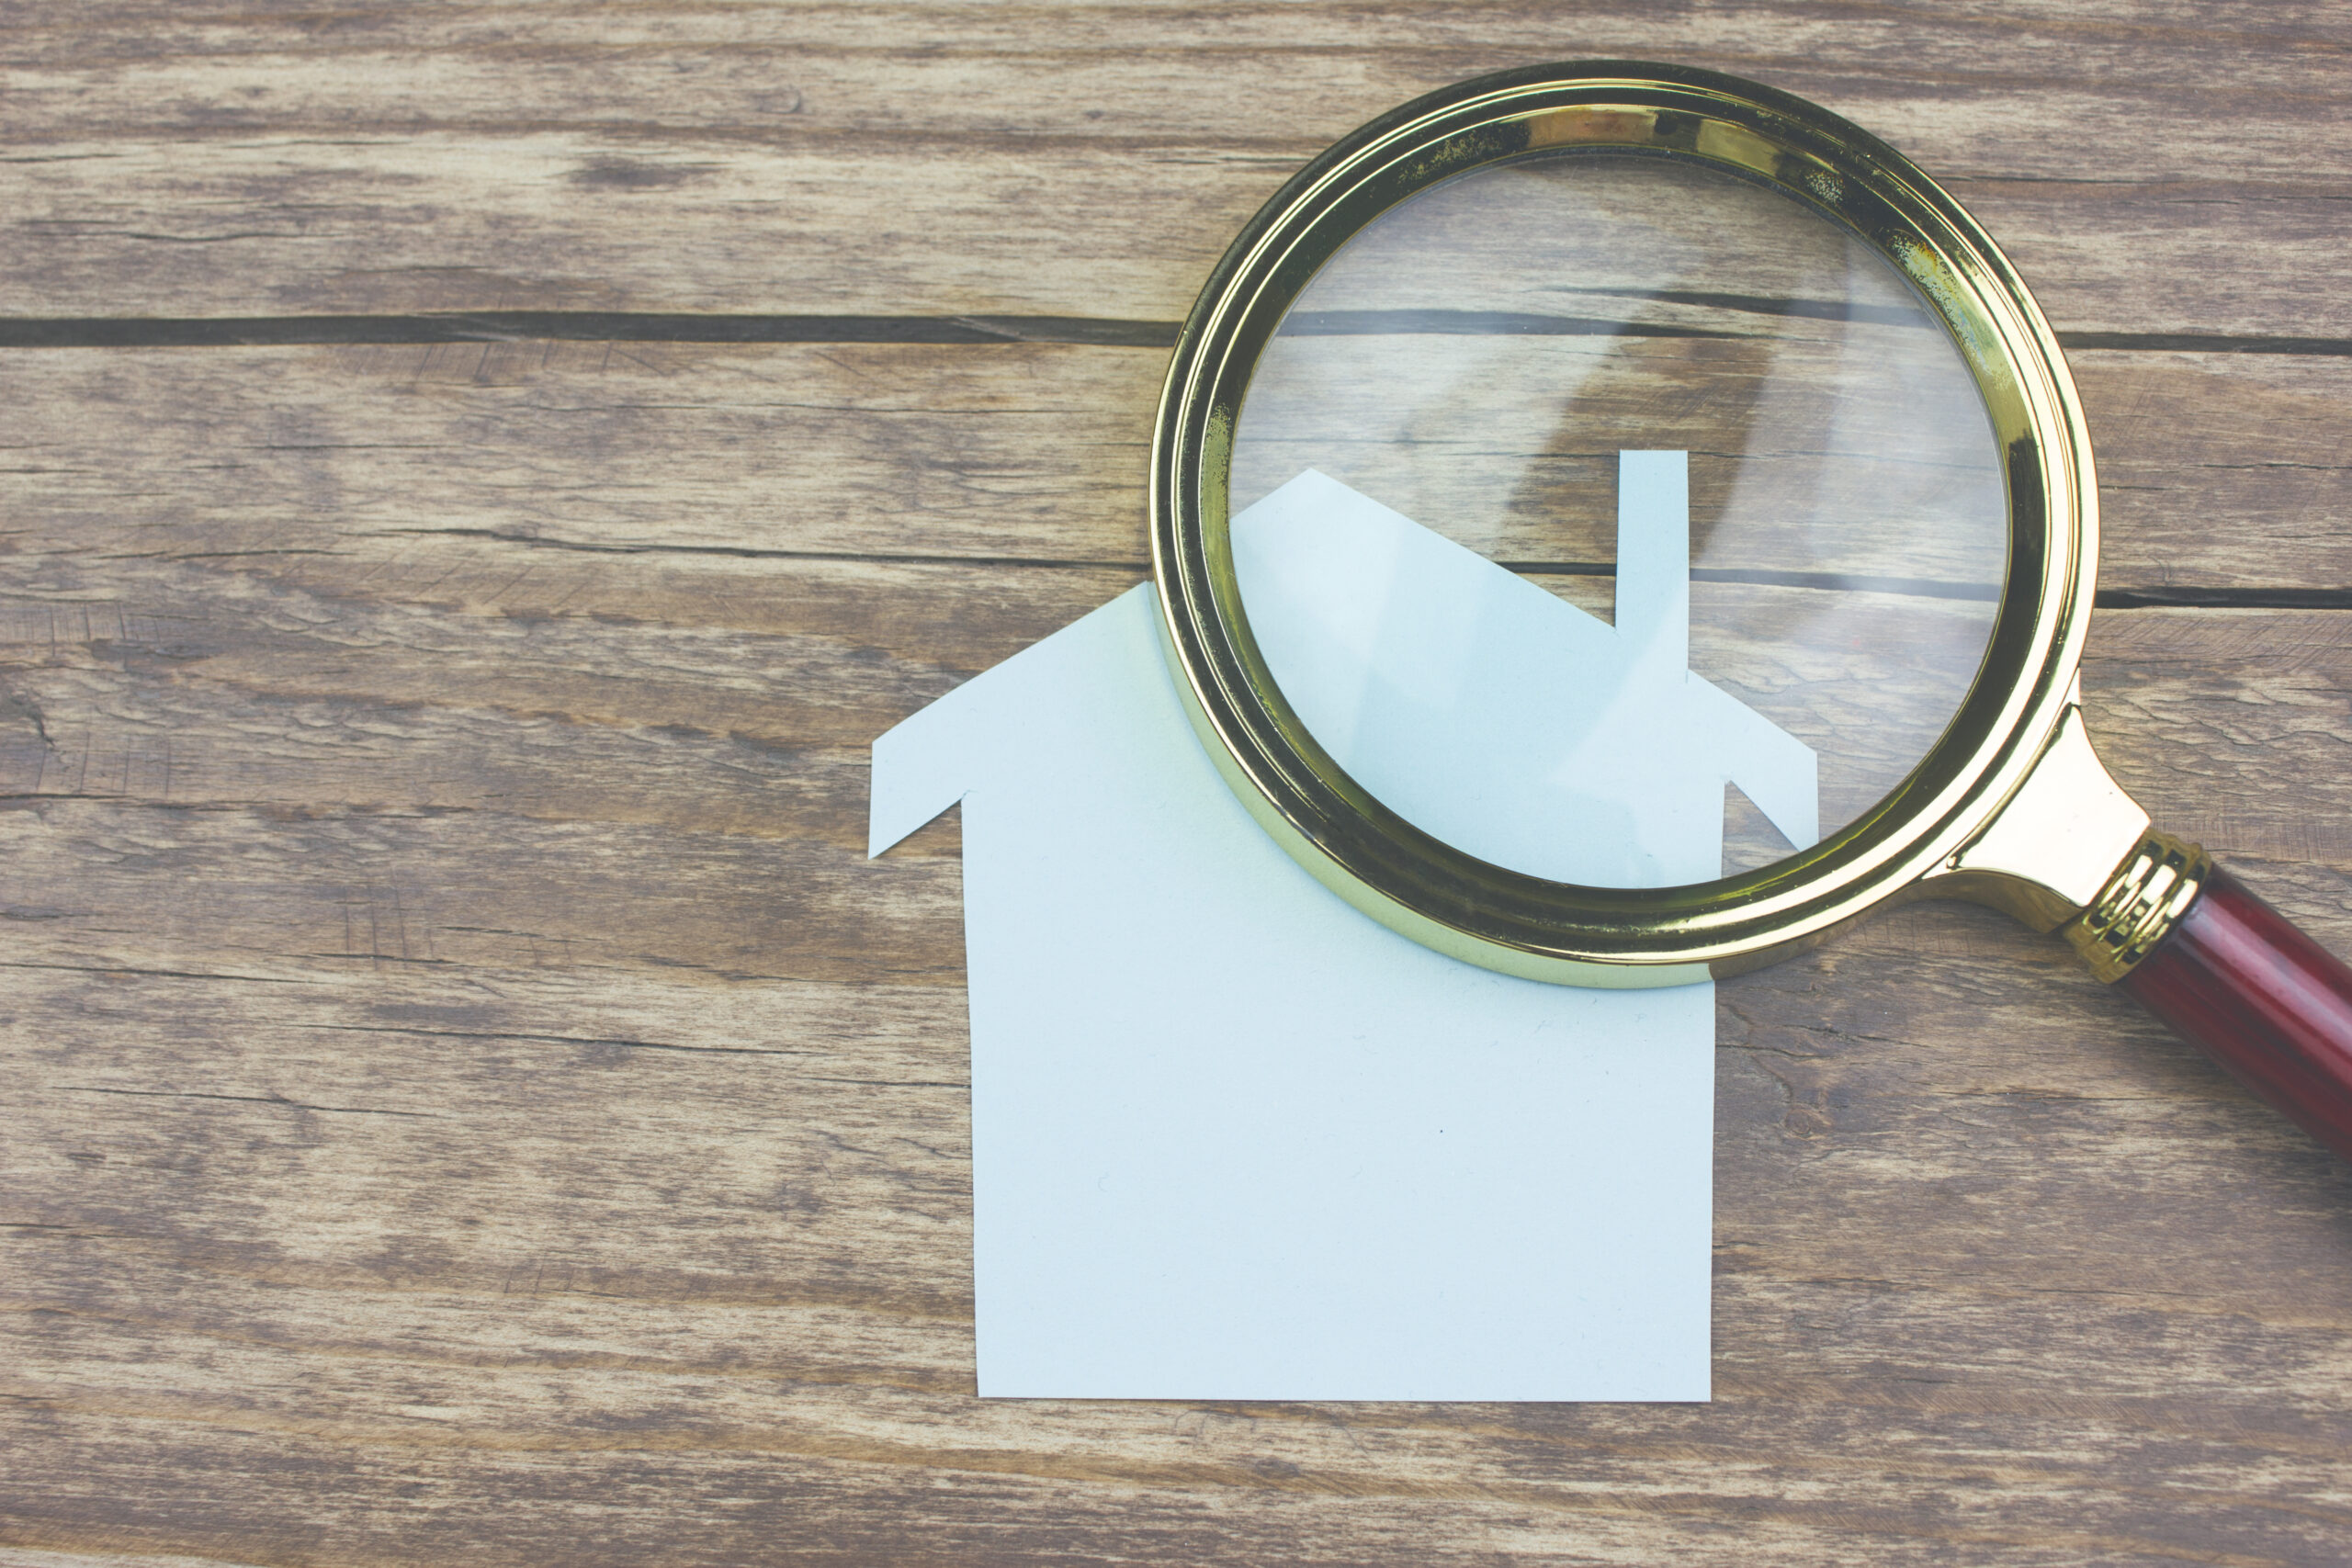
Home inspectors perform an inspection on most all of the systems in a home. However, they will be the first ones to say that they cannot thoroughly inspect a chimney because they can only inspect what they can see.

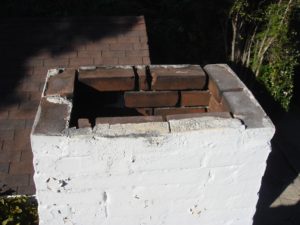
Home inspectors can inspect the firebox (where you make the fire) and they can inspect the top of the chimney (if they get on a roof), but home inspectors cannot inspect the most critical part of the chimney system–the flue lining.

Most chimneys built after the 1940s have a flue lining. For the most part, this lining is made out of terra cotta (clay), pumice or, currently, the lining is made out of metal. If this lining is damaged or non-existent, the chimney can no longer be used.

Chimneys constructed without linings are called “Unlined Chimneys.” According to the Chimney Safety Institute of America, they specifically say: “Never use a chimney that does not have a liner or has a damaged or improper lining.”

If a chimney is dirty, it’s absolutely impossible to inspect the chimney. There is no possible way to see through a thick layer of creosote build-up to inspect the flue lining for cracks or missing mortar joints. In this case, the chimney must be swept first before doing any inspection. Home inspectors don’t sweep chimneys which is yet another reason why home inspectors cannot completely inspect the chimney.

For this reason, most home inspectors and real estate professionals will recommend a more thorough chimney inspection be done by a CSIA Certified Chimney Sweep.

The difference between the levels of inspection varies between how in-depth the inspection is, which areas are to be inspected, what types of tools are used to access various parts of the chimney and to what degree of invasiveness. Here is a quick breakdown of the Levels of Chimney Inspections:

Level 1 Chimney Inspections

This is a typical inspection done annually as part of routine chimney maintenance. In most situations where there have been no changes in usage or fuel type during the recent past or there have been no major performance problems, then Level 1 Chimney Inspections are sufficient. Inspecting the top of the chimney from the roof or ladder is not part of Level 1 Chimney Inspections. We also make sure that the proper clearances to combustibles are within code in accessible locations.

Level 2 Chimney Inspections

This level of inspection is recommended for:
* When there has been a change of fuel type (such as going from wood burning to gas log burning)
* When relining a chimney or installing an appliance such as a stove insert
* Upon sale or transfer of the property during a real estate transaction
* After a malfunction or chimney fire event
* After an external event such as an earthquake or major weather event

Level 2 chimney inspections are much more in-depth than Level 1 chimney inspections. Most chimney professionals will use a video camera to see all parts of the flue lining. These video inspections will allow us to see aspects of the chimney that Level 1 chimney inspections cannot. Specifically, we’re looking for cracks in the flue lining or missing mortar joints between the flue tiles. In addition to the video scans of the flue lining, these Level 2 Chimney Inspections also may include accessible portions of the chimney’s exterior, as well as attics, crawl spaces and basements.

If a chimney has not been used in a long time, it’s common to have spider webs. In this case, these spider webs will show up as cracks during a Level 2 inspection with a video scan. The spider webs can sometimes give us a false reading and may show cracks when there are no cracks. For that reason, we likely will recommend a chimney sweeping as part of Level 2 chimney inspections.

Level 3 Chimney Inspections

Level 3 Chimney Inspections are rare and are recommended only when Level 1 or Level 2 chimney inspections are not sufficient to determine the serviceability of the chimney. These Level 3 chimney inspections include all aspects of Level 1 and Level 2 chimney inspections but may also include dismantling parts of the system or cutting into walls in order to gain access for areas of the chimney not accessible by other methods.


This NFPA standard, with the three Levels of Inspection, is for the benefit of the homeowner. A CSIA Certified Chimney Sweep will be able to determine and recommend which level of chimney inspection is needed for the situation.

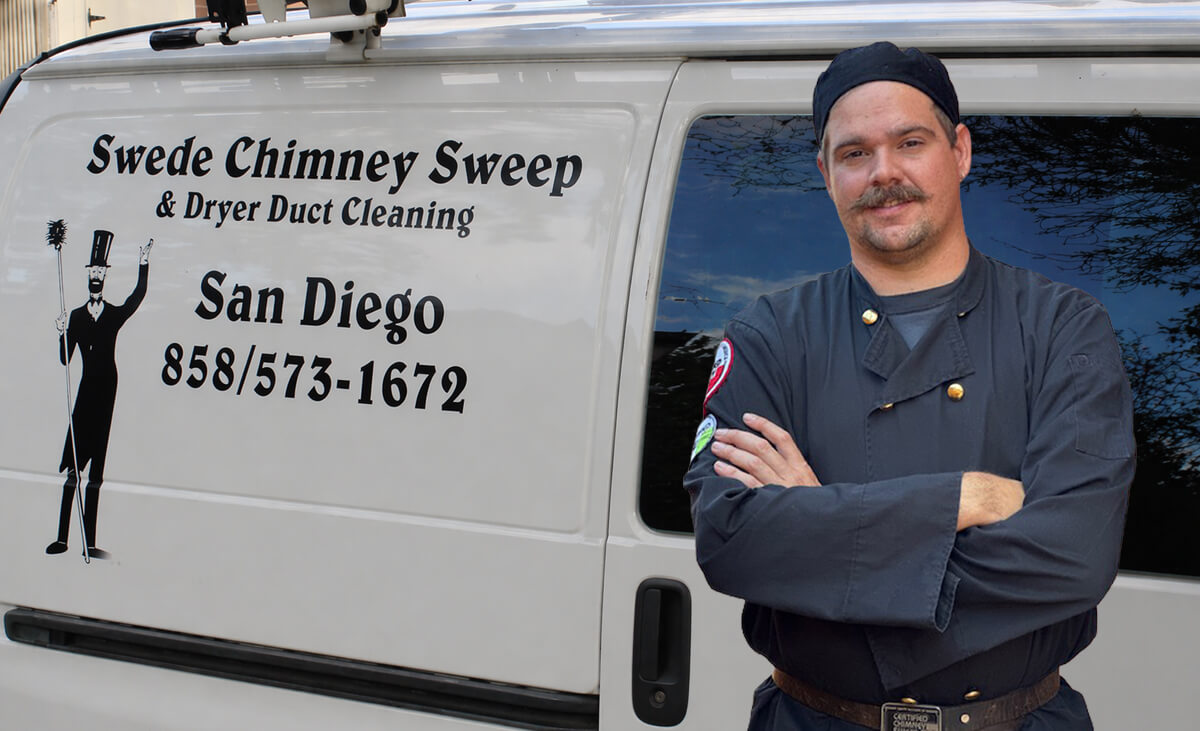
And remember, the National Fire Protection Association and the Chimney Safety Institute of America recommend that all chimneys be inspected annually and swept if necessary. To find a qualified CSIA Certified chimney professional in your area, be sure to go through the Chimney Safety Institute of America.

Here is further information on the Levels of Inspection. [Video credit: Chimney Safety Institute of America]

Call your chimney sweep today

Autumn is the time of year to call your chimney sweepThe kids are back to school and life has returned to the normal routine. The leaves are starting to turn colors. Sunrise is later and sunset is earlier. Autumn is here. Soon enough you’ll be looking at the fireplace, wanting to light a fire on a cool evening. Then you realize that you can’t remember the last time you hired a chimney sweep.

Chimney-related businesses are very seasonal. The best time to contact a chimney sweep is in the spring and summer when the rates are the lowest and you can get an appointment within a short amount of time. Waiting until it gets cold will mean paying more and having to wait four or five weeks (sometimes more) for an appointment.

Call a chimney sweep today before the rates go up.

Six things to consider when hiring a chimney sweep

1) CSIA Certification – Make sure that you’re using a CSIA Certified Chimney Sweep. These are highly trained chimney professionals, educated in current building codes and fire codes. They also have to sign a very strict code of ethics. This certification must be renewed every three years in order to stay up-to-date with these codes. To find a Certified Chimney Sweep, go to the website for the Chimney Safety Institute of America. Enter your zip code in the search box at the top. It’ll then give you a whole list of CSIA Certified Chimney Sweeps from closest to furthest away within a 50-mile radius.

2) General Liability Insurance – Any contractor who steps on your property should carry general liability insurance. If a treeContractor with tool belt 
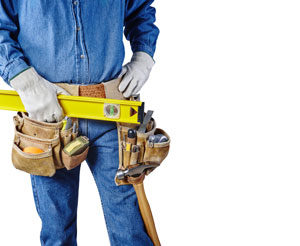
trimmer cuts down your tree and it lands on your neighbor’s roof, without insurance, the homeowner may be financially responsible for those repairs to the neighbor’s roof. Ask the contractor for a copy of his “Certificate of Insurance.”

3) State Contractor’s License – In California, any work that amounts to more than $500 (labor and materials) requires a contractor’s license. To check a contractor’s license in California, go to the website for the California State Licensing Board. In most cases, because chimney sweeping falls below the $500 limit, a contractor’s license is not required but having a license adds to the legitimacy of the business.

4) Workers’ Compensation – If an employee of a contractor becomes injured while on your property, workers’ compensation will pay for the employee’s injuries. This is very important protection for the homeowner. Imagine if an employee of a tree contractor cuts off his hand while cutting down your tree and the employee doesn’t have workers’ compensation coverage, the homeowner may be financially responsible for those injuries. To determine if the contractor carries workers’ compensation insurance, go to the California State Licensing Board website and enter the license number. The website will provide information on workers’ compensation coverage. Another way to verify coverage is to ask the contractor for a copy of his Workers’ Compensation Proof of Insurance.

5) References – To find a qualified company, ask your friends, family, and co-workers who they’ve used. Word of mouth is a great way to find a chimney sweep company. But be sure to check on the contractor’s certification, license and workers’ compensation.

6) Reviews – Check a company’s reputation by going to Google Reviews, Nextdoor, Yelp, Angie’s List, or Better Business Bureau. If you see a lot of bad reviews, it’s best to choose a different company.

Call your chimney sweep today before you start using your fireplace!

Birds in Chimneys

Birds on top of chimney
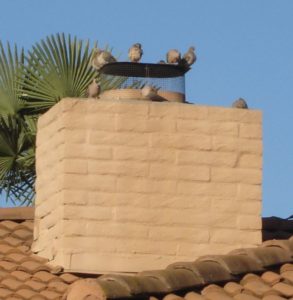
As I’m sitting in my office working, I can hear the high-pitch chirping from some obviously newly-hatched baby sparrows just above my office window. I’m not surprised by the chirping. I’ve been watching the mama bird building her nest on a ledge just above my window for several weeks. During her time building her nest, every time we walk below her nest, she quickly flies away, only to return when we are out of sight. I don’t mind the nest, nor the sound of the constant chirping of the chicks. I don’t even mind the bird poop below the nest on our walkway. It’s the circle of life and I love it.

Apparently, I’m not the only one who is dealing with new nests during the spring. We’ve been getting a lot of phone calls from homeowners who are concerned that birds are coming into the chimney. Here’s some information that you need to know.

Are the birds INSIDE the chimney?

“Are the birds INSIDE the chimney?”  That’s not a dumb question. Just because you hear bird noises coming from the chimney, it doesn’t necessarily mean that they are INSIDE the chimney.

Prefabricated chimneys have a metal flue pipe with a termination cap at the top. Birds like to hang out at the top. Their chirping through the metal flue pipe creates what I call the “Megaphone Effect.” We chimney sweeps have gone out to homes many times because homeowners insist that these feathered friends are inside the chimney, only to determine that they are just hanging out at the top. The good news is that no birds are inside the chimney.

Once the birds get into your chimney

The bad news is that if birds do get inside the chimney, they’ll fall down on top of the closed damper or behind the damper in the area called the smoke shelf. Then the bird gets trapped. Once the bird lands in the smoke shelf, it’s extremely difficult for them to get out on their own.

Once the bird has flown into your chimney, that chimney is now considered its natural habitat. This makes it a felony for anybody to remove the bird or active nest from its natural habitat without a special wildlife permit. Due to the Migratory Bird Treaty Act of 1918, there is a potential $15,000 fine per bird, nest, or egg as well as possible jail time and confiscation of any equipment or tools involved with the removal of said birds.

Chimney sweeps have been targeted by the U.S. Fish and Wildlife Service as frequent violators of these federal laws. Many chimney sweep companies simply didn’t realize that it’s against the law to remove birds from chimneys and what kind of potential heavy fines they are opening themselves up to. For that reason, we recommend contacting animal rescue organizations who have the wildlife permit.

After the birds are gone…

Chimney Cap
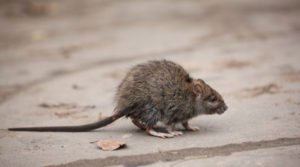
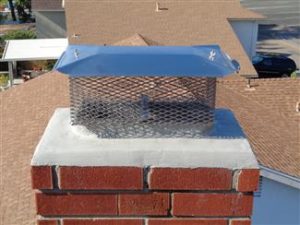
The best way to deal with birds getting into your chimney is prevention. Once birds are gone from the chimney and the nest has been abandoned, we recommend having the chimney inspected and swept to remove any nesting material. In addition, installing a chimney cap will prevent future birds as well as rodents and other critters from entering the chimney.

To find a qualified chimney sweep company to install a chimney cap, make sure you use a CSIA Certified Chimney Sweep through the Chimney Safety Institute of America.

We have a responsibility as humans to care for our wildlife. We can live in harmony with these precious creatures. Soon enough, I know I’ll miss that sweet chirping just outside my office window.

Gas logs on fire in fireplace

16 Tips To Know About Artificial Gas Logs

Gas logs on fire in fireplaceGas logs are so very convenient–no fuss, no mess; instant on-instant off; clean burning to the environment as well as very little creosote build-up in the chimney.

Before making that decision, there are several things to take into consideration first. To help you, here are 16 tips you need to know when deciding on artificial gas logs.

1) First things first, analyze the pros and cons of gas logs to make sure that you know all the facts to make an informed decision.

2) If your fireplace isn’t plumbed for gas, consult with a licensed plumber who specializes in gas. Depending on where the gas is located, the cost for routing the gas to the fireplace may be cost-prohibitive which may be a deciding factor in the decision to install gas logs.

3) Choose which type of gas you will be using–Natural Gas or LP (propane).

4) Determine if you want vented or unvented (vent-free) gas logs. Keep in mind that unvented gas logs are illegal in many states, including California.

5) Decide on how you want to start and control your gas log set: Match Light; Manual Safety Pilot or Remote Control.

6) Have the chimney inspected and swept if needed by a CSIA Certified Chimney Sweep. Make any necessary repairs to the system so you can start with a clean slate.

7)  Purchasing a gas log set with a lifetime warranty on the logs is a good investment.  These better quality logs have the added benefit of looking more realistic.

8)  Gas log sets that have white-color logs (such as Birch or Beech woods) will darken up from flame impingement (sooting) and after a while, may not look so nice.  A certain amount of flame impingement is natural.  Artificial gas logs that are darker in color (such as oak) will still have flame impingement but it won’t be so obvious.

9) Measuring the firebox to determine the proper size of gas logs is absolutely critical. If a gas log set is too large, the log set will sit too far forward and you may have gas spillage into the room. Here is how you can measure your firebox:

Measuring for gas logs

A) Measure the front width of the firebox
B) Measure the width of the backwall of the firebox
C) Measure the depth of the firebox from front to back
D) Measure the height of the firebox opening
E-1) Which side is the gas stub location: Left? Right? Rear? Floor?
E-2) How far does the gas stub extend into the firebox:
E-3) What is the distance from the gas stub to the firebox floor:

10) There should be a minimum of 3″ on each side, from the gas logs to each side wall. (For Manual Safety Pilot systems and Remote Control Gas log systems, the clearances are more. See manufacturer’s instructions for sizing.)

11) When installing gas logs, the manufacturer’s instructions will show how the logs are to be positioned on the grate. This is critical. If the logs are not positioned correctly, you can have gas spillage into the room. A professional installer will use a special gas-detecting tool to detect gas spillage. After the installer has tested the placement of the logs, don’t ever move the logs. They are supposed to be positioned in a very specific way. Note: Simply using a “soap bubble test” will not detect gas spillage into the room.

12) Adding small black lava rocks, realistic glowing embers, black glass, pine cones, acorns and wood chunks will enhance the beauty and the realism of the artificial gas logs. Some gas log manufacturers have also created “cracklers,” which are devices that replicate the sound of a wood burning fire.

13) Completely covering the gas burner tray with sand, silica or vermiculite  is important. Otherwise, flame impingement (sooting) on the gas logs can occur. Also, sand in the burner pan can prevent overheating.

14) Install a damper clamp to lock the damper in a FULLY OPEN position. A damper that is partially or completely closed will allow for more heat from your fireplace but will also allow gases to enter into the home which is extremely dangerous.

15) Always make sure that your gas logs are not on at the same time as your furnace or central heater. If you do, you can lose the draw from the fireplace so instead of the gases going up the flue, they can enter the room instead. Remember: One on at a time, never on at the same time.


Bonus Tip to Enhance the look of Gas Logs:

16) Before installing artificial gas logs, paint the firebox black, using a high temperature paint. This brings all the focus on the beautiful gas logs instead of the smoke-stained walls from previous wood-burning usage.


Artificial gas logs provide convenience, an attractive and realistic display of a wood fire while clean burning to the environment and to your chimney.

Roof rats love your chimney!

A chimney cap will prevent roof rats from entering a home
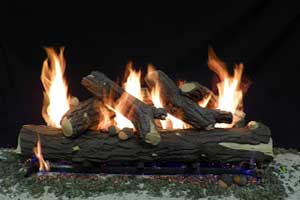
Even if homeowners don’t use their fireplace, there are still very important reasons to have a chimney cap.

This last week, as a chimney sweep, I received a record number of phone calls from people who had critters in their chimney.  This time of year here in San Diego, during the rainy season, it’s not uncommon to get these phone calls.  Critters are always looking for a dry, warm, dark place during the rain.

Here in San Diego, in many cases, these critters are roof rats. Once they get down the chimney, they land behind the damper in an area called the smoke shelf. Once they go down, it’s difficult if not impossible for them to find their way back up the chimney. If your damper is open, it’s easy for the roof rats to find their way into your home. Not good!

Birds are also a problem

In addition, this is about the time of year when birds are finding places to nest. If a bird gets in a chimney and builds a nest, it is illegal for any person to remove a bird or an active nest without a special wildlife permit, according to the Migratory Bird Treaty Act of 1918. You have to wait until the birds and chicks leave the nest permanently on their own or until the birds die. If the birds die inside the chimney, the smell is disgusting.  Even worse, the leftover nest carries dangerous diseases such as histoplasmosis.

As of March, 2020, here is a comprehensive list of 1,093 species of birds covered under this Act. This list even includes pigeons!

This Act is one of the oldest wildlife protection laws on the books.  According to the MBTA, “It is a misdemeanor to violate any provision of the Act with punishment of a maximum fine of $15,000 or imprisonment up to six months or both…” unless you have a special permit issued by the U.S. Fish & Wildlife Service.

The best way to prevent birds, and other critters, from coming into a chimney is with a chimney cap.

Four other very important reasons for a chimney cap

In addition to preventing critters from entering your home through the chimney, there are four other important reasons to install a chimney cap.

A chimney cap, because it has a spark arrestor mesh, prevents hot flying embers from landing on your roof, on your neighbor’s roof, in dry brush or on solar panels and cars.

Chimney CapA chimney cap with a solid lid on top will prevent most of the rain from entering the chimney. Over a long period of time, rain that enters the chimney will land in the smoke shelf and can then rust out a damper and deteriorate a chimney from the inside out.

A chimney cap prevents leaves and other debris from falling into the chimney from the top. Leaves and debris are a combustible material and can create a potential safety hazard in a chimney.

Downdrafts can create smoking problems. Installing a specially-designed windcap will prevent smoking problems caused by downdrafts.


If your chimney does not have a chimney cap, it’s a good idea to install one. Call a CSIA Certified Chimney Sweep today to install a chimney cap to prevent those “unwelcome visitors” from entering your home!

Chimney Caps and Termite Tents

Chimney cap askew on top of a chimney
Photo credit: Rick Pocock

What do chimney caps and termite tents have in common? More than you think!

Several times a year, the strong Santa Ana winds hit Southern California. These winds are something we San Diegans dread because it usually brings with it the threat of wildfires. But there’s something else that occurs due to these forceful winds.

After the winds subside, I get numerous phone calls from customers who notice that their chimney caps have flown off and landed in their back yard. The first question I now ask: “Have you recently had your house tented for termites?” In every single case, the answer is always “Yes.”

What happens to Chimney Caps when your house is tented?

In our experience as chimney sweeps, we have experienced two scenarios:

Scenario #1) The pest control company leaves the chimney cap on the chimney during the termite tenting. In this case, the full weight of the heavy tent is on the highest point of the house which, in many cases, is the chimney cap. The full weight of the termite tent will crush the cap. With a crushed cap, this creates a dangerous situation for the homeowner. Using your

A termite tent will crush chimney caps
Photo credit: Adobe Photos

fireplace with a crushed chimney cap will mean that the smoke, gases and carbon monoxide cannot vent. The hazard is especially dangerous when the homeowner has artificial gas logs where the gases are colorless and odorless. This is a potentially DEADLY situation.

Scenario #2) The pest control company removes the chimney cap and re-installs it after the termite tenting has been completed. There have even been cases where we’ve seen the cap was simply sitting on top of the chimney without even being attached in any way to the chimney. Unfortunately, many pest control companies do not know how to re-install the chimney cap properly and the first wind that comes up, the cap goes flying. Hopefully, the cap doesn’t land on your tile roof, solar panels, through your neighbor’s window, on a car, or even worse, on a person.

How to prevent problems with Chimney Caps

After your home is tented for termites, always have the chimney inspected by a chimney sweep certified through the Chimney Safety Institute of America (CSIA). A CSIA Certified Chimney Sweep will not only be able to ensure that the chimney hasn’t been damaged by the heavy termite tent but will also be able to verify that the chimney cap is installed properly.

Make sure a termite doesn’t affect the safety of your fireplace!

Problems with an Unlined Chimney

The top of an unlined chimney
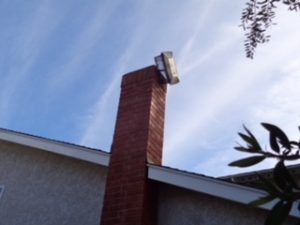
As a chimney sweep, the most important part of a chimney that we inspect is the flue lining. In many older homes, there is no flue lining. This type of chimney system is referred to as an unlined chimney. According to the Chimney Safety Institute of America, “Never use a chimney that does not have a liner…”

What is an unlined chimney?

Simply stated, an unlined chimney is a chimney without a flue lining. The flue lining is a pipe that can be made from terra cotta, pumice or stainless steel. The flue lining should go from the very top of the chimney down to the bottom, to the smoke chamber above the firebox.

Depending on the region of the United States where you live and what building codes were in place at the time the chimney was built, flue linings have been required since the early 1900’s. However, here in San Diego, we see unlined chimneys as late as the 1950’s. In the 2016 California Residential Code, Chapter 10 – R1003.11 it states specifically, “Masonry chimneys shall be lined.”

In the 1940’s and again in the 1980’s, the National Bureau of Standards performed tests on unlined chimneys. After testing for just 3½ hours, the woodwork adjacent to the unlined chimney caught on fire. The test was abandoned at that point because the unlined chimney failed to perform its function. The researchers concluded that “building a chimney without a lining was little less than criminal.”

Interior of an unlined chimney
Looking down an unlined chimney, there is no flue lining

The mortar joints between the bricks in an unlined chimney also fail. Many masons in the early years of building unlined chimneys added a lot of sand to the mortar. The mortar is like the glue that holds the bricks together. As the mortar in the joints gets older and deteriorated, the mortar joints fail, becoming sand. This creates gaps and holes in the mortar joints inside the chimney. These gaps allow heat, gases (such as carbon monoxide) and embers to penetrate and transfer to surrounding combustibles such as the wooden infrastructure of the home.

Without a lining, an unlined chimney “can no longer contain the elements of combustion.” When we see unlined chimneys in our customer’s homes, we recommend not to use the chimney until the chimney has been repaired.

How do you know if you have an unlined chimney?

Perhaps you had a home inspection done when you purchased your home. What most home buyers don’t realize is that home inspectors do not inspect flue linings. You cannot depend on a home inspection to determine if your chimney is lined or unlined. This is why it is essential to get a separate chimney inspection by a CSIA Certified Chimney Sweep BEFORE you purchase a home. Here’s how to find a CSIA Certified Chimney Sweep.

A CSIA Certified Chimney Sweep will not only be able to determine if your chimney is lined or unlined, but will also be able to inspect the condition of the flue lining if you have one. Again, the flue lining is the most critical component of your entire chimney system.

How to repair an unlined chimney

Assuming the chimney is structurally sound, the chimney can be relined, although new methods may be found in various parts of the United States.

Relining a chimney is where a metal pipe is installed inside the chimney structure to become the new flue lining. In most cases with these older systems, the firebox is rebuilt at the same time. Typically a top-mount damper is installed along with a flue cap.

Prices for relines vary from region to region. Chimneys in poor condition may also require additional extensive repair before relining.

If the unlined chimney is not structurally sound, a reline may not be a consideration. In that case, tearing down the chimney and rebuilding it with either a new masonry chimney or installing a prefab system would be the only other option.


First things first, have your chimney flue lining inspected by a CSIA Certified Chimney Sweep to make sure you don’t have an unlined chimney!

[Photo credits: Rick Pocock]

What is a Masonry Chimney?

A masonry chimney on the exterior wall of a home

Just like automobiles that have different manufacturers and models, the same goes for fireplaces and chimneys.

Here in Southern California, there are primarily three different types of open fireplace systems–1) masonry chimneys; 2) prefabricated, factory-built systems; and 3) Rampart General Pre-Cast systems. Since I’ve already addressed Rampart General Pre-Cast systems in the past, this post will be about the masonry chimney.

The History of the Masonry Chimney

These masonry systems have been around for many centuries and are tried and true. They are constructed on-site with bricks, stone, concrete blocks and mortar. Masonry systems are built by hand, brick by brick. If the system is built properly and maintained regularly and there are no extenuating events (such as earthquakes and wildfires), they will last a century or more. In fact, it’s not uncommon to see masonry chimneys still in use in houses built in the 18th and 19th centuries.

Unfortunately, due to the high cost of labor, these systems haven’t been constructed since the mid-1980s here in Southern California except for in high-end, custom-built homes.

For a fireplace to work properly, there is a formula involved in building a masonry chimney system. Some of the factors in this formula have to do with the height of the chimney, the diameter of the flue pipe, and the height/width of the firebox opening. If a system isn’t built properly, the chimney will never draw properly and will have ongoing smoking problems.

Components of a Masonry Chimney and Fireplace

It’s important to know the various components of a masonry chimney:

Flue cap – The chimney cap consists of spark arrestor material with a solid lid. It provides three primary benefits: 1) It prevents embers from getting on the roof; 2) It prevents birds, rodents and other critters from entering the home through the chimney; and 3) Flue caps with solid lids will also prevent most of the rain from coming down the flue lining. Without the solid flat lid of the cap, rain would land in the smoke shelf which may cause damage to the damper and may deteriorate the firebox.

Crown – The crown is a concrete or mortar surface at the very top of the chimney structure. Its purpose is to direct water Masonry chimney components
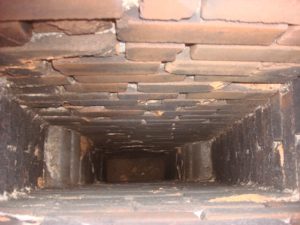
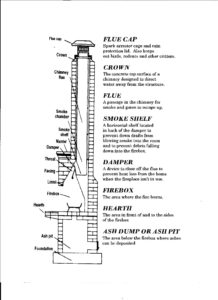
away from the structure. A crown can also be referred to as a “wash” or a “splay.” A cracked crown will allow moisture to get into the chimney structure, eventually creating cracks in the chimney structure.

Flue – The flue is the passageway from the firebox to the top of the chimney structure. In a masonry chimney, the flue is lined with a flue lining typically made from terra cotta, pumice or metal.

If the flue lining is cracked, broken or if the mortar joints are missing between the flue tiles, the system cannot be used because of heat transference or deadly carbon monoxide leaking into the house. There are three primary methods for repairing cracked flue linings–1) relining the system with a stainless steel pipe; 2) installing a stove insert with a metal pipe to the top of the chimney structure; or 3) a poured cement, cast-in-place system.

In addition, older systems may not have a flue lining at all (which is referred to as an “Unlined Chimney”). In this case, the system cannot be used until it has been repaired.

Flue tiles – A flue lining inside a flue is basically a vent pipe. This pipe is not one solid pipe. In most cases, the pipe (typically terra cotta or pumice) is made up of pipe sections called flue tiles. Each flue tile (pipe section) is anywhere from 12″ to 24″ tall. In between each flue tile is the mortar. There should not be any gaps or voids in the mortar joints.

Smoke Shelf – A horizontal shelf located behind the damper to prevent down drafts and to collect debris that has fallen down the chimney.

Damper – The device that opens and closes so that heat is not lost from the home when the fireplace is not in use. Some dampers can be installed at the top of the chimney flue.

Lintel – A horizontal metal piece that extends over the entire width of the firebox opening at the top of the firebox opening. It is a structural part of the firebox. Here’s important information on why you never want to remove a lintel.

Firebox – The area of the fireplace where the fire is burned.

Exterior Hearth Extension – The area that extends in front of and to the sides of the firebox opening. The exterior hearth extension should be made from non-combustible materials and should be differentiated from the rest of the room’s flooring.

Ash Dump – Not all masonry systems have an ash dump. This is the area below the firebox where the ashes can be swept down into. A firebox with an ash dump will typically have a metal plate in the firebox’s floor. This metal plate can be opened to brush the ashes below.

Clean-out Door: The clean-out door is located on the outside of the chimney structure near ground level to clean out the ashes from the ash dump.

Unlined Masonry Chimney

Before the early 1900s, masonry systems were not constructed with a flue lining. We refer to those systems as “Unlined Chimneys.” According to the Chimney Safety Institute of America, “Never use a chimney that does not have a liner or has a damaged or improper lining.” [Public Safety Bulletin issued by the Chimney Institute of America: The Importance of Flue Lining in Your Masonry Chimney.] Here in San Diego, however, we have seen unlined chimneys as late as the early 1960s.

When these unlined systems were originally built, the masons used a material called parging (like stucco). They hand-coated over the bricks and mortar joints inside the chimney flue. With time, age and usage, this parging material has worn away, leaving the bricks and mortar joints exposed. In addition, back then the masons used a lot of sand in their mortar. Eventually, these mortar joints disintegrate, leaving gaps and voids. This creates a potentially dangerous situation.

If the unlined chimney is structurally sound and there are no other issues with the system, the system can be “relined.” This is a method where a stainless steel pipe is installed inside the chimney structure. However, if the metal lining is not installed properly or is undersized, the fireplace can be dangerous and/or will not ever draw properly.  Relining a chimney should only be done by a licensed and qualified chimney professional.

Make sure to use a CSIA Certified Chimney Sweep to inspect your system and sweep it if needed. If your masonry chimney is maintained, it will give you warmth and comfort for many years, decades and maybe even centuries to come.


Caveat: Chimneys are built differently in various regions throughout the country. What is common in one region may not be common in another. This information provided here is based on what we see in Southern California.

14 Need-to-Know Facts about Seasoning Firewood

Firewood that has been seasoned
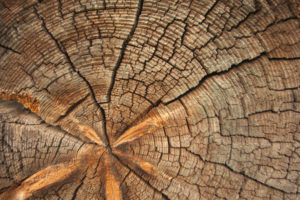
Here are some interesting facts that will help you season your firewood for your fireplace or stove.  Seasoning your wood is critical not only for safer fires, but to reduce creosote buildup in your fireplace or stove flue pipe and to reduce pollutants into the atmosphere.  This is the second post in a series of three that will explain how to purchase, season and store your firewood.

1) Only burn seasoned firewood. Wood should be aged at least six to twelve months and sometimes longer, depending on the density of the wood, species of wood, and climate.  Soft woods only need six months whereas hard woods can sometimes take up to two years.

2) The moisture content of wood should be between 15%-20%, never to exceed 25%. Homeowners can purchase moisture meters from most hardware stores or Amazon for under $30.

3) Freshly-cut wood has a moisture content of about 50%.

4) Seasoned wood will create a clear hollow sound when knocking two pieces of wood together. Non-seasoned wood will create more of a dull thud sound.

5) Moisture in the wood is held in by the bark. Removing the bark before seasoning the wood will reduce the time to age it.

6) Aged wood will be lighter in weight than regular wood because there’s less moisture.

7) Seasoned firewood will change colors. Instead of a lighter color in new wood, the seasoned firewood will appear gray or dark brown.

8) You will notice the center of the wood will crack as it ages.

9) When burning wood that hasn’t been aged long enough, not as much heat will be produced because of the loss of heat due to evaporation of moisture.

10) Don’t trust a wood supplier to be honest with how long the firewood has been aged. Firewood that hasn’t been split and/or has been just thrown into a large woodpile will not be seasoned properly.

11) Experienced wood burners will purchase firewood at least six months ahead of the season to guarantee that the wood has been aged long enough. It’s always best to buy your wood in the off-season when it will be cheaper and firewood is more plentiful.

12) Burning firewood that isn’t aged long enough will be harder to start, will create a smokier fire, will produce less heat and will create a faster build-up of creosote in the chimney flue.

13) Anytime you burn wood, creosote is created.  We chimney sweeps divide creosote buildup into three categories–Stage 1, Stage 2 and Stage 3.  Stage 1 and Stage 2 creosotes are easily removable with a normal chimney sweeping whereas Stage 3 is far more difficult to remove. Stage 3 creosote is also known as “Glazed Creosote” because of its shiny appearance and it is highly flammable and more likely to cause a chimney fire.  Glazed creosote is much more expensive to get rid of from your chimney flue lining due to the difficulty of removal.  The chances of creating Stage 3 creosote is much higher when burning unseasoned wood.

14) Seasoned wood produces less smoke and increases efficiency; therefore less pollutants into the atmosphere.


Have your chimney inspected on an annual basis and sweep if needed before using your fireplace. The best way to find a qualified chimney sweep is to go through the Chimney Safety Institute of America.

10 Need-to-Know Facts About Purchasing Firewood

Split firewood
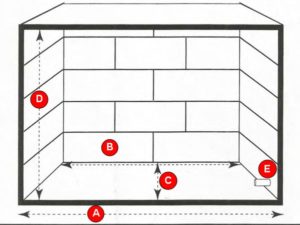
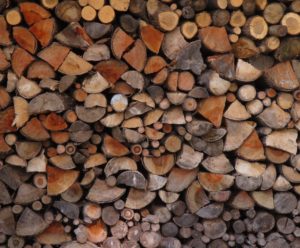
Here are some interesting facts that will help you purchase firewood for your fireplace or stove. If you do it right, you will save money while keeping your family safe and toasty.  This is the first post in a series of three that will explain how to properly purchase, season, and store firewood.

1)  When you buy firewood at a gas station, supermarket, hardware store or big box store, you have no idea how long it’s been aged, if at all. These convenient bundles may be fine for a campfire or beach bonfire but not for your fireplace or stove. Plan ahead.

2)  Buying firewood by the bundle is the most expensive way to purchase fuel for your fireplace.

3)  The price for firewood varies dramatically from wood supplier to wood supplier and from region to region so shop around.

4) Common woods vary from region to region. As an example, here in Southern California, the most common woods are avocado, eucalyptus, pine and oak. Eucalyptus and avocado have a lot of oil in the wood so they create more creosote buildup in your fireplace or stove flue pipe. Pine, because it’s a soft wood, is great to start a fire. Once a fire is established, throw on the oak, a hard, dense wood that will give you a long-lasting, hot, clean-burning fire. Avocado, eucalyptus and pine will be less costly than oak but oak will give you a longer lasting, cleaner fire.

5) Pinyon pine, another type of wood found in the Southwest United States, as well as wood from fruit trees are also good quality firewood found here in Southern California.

6) Some chimney professionals will tell you to never burn eucalyptus or avocado woods. Both avocado and eucalyptus, because of the high oil content, can produce more creosote buildup than other woods, even if the woods are aged long enough. This creosote buildup makes it even more critical to have your chimney inspected on an annual basis as specified by the National Fire Protection Guidelines.

7) Use a reputable wood supplier. Not only will they be more honest about how long the wood has been aged but also more honest about the quantity of the firewood you purchased. If you suspect that you have been shorted by your local wood supplier, contact your weights and measures office before you use the wood.

8) Never buy or burn firewood that has been treated with stain or paint. This includes construction scraps which is treated wood. The chemicals can be toxic when burned.

9) To save money, buy unseasoned wood. An added benefit is that you’ll know for sure how long the firewood has been aged since you’ll be aging the wood yourself.

10) Buy firewood from local sources! Bringing wood from one region to another increases chances of transporting insects from their origin. Invasive species of insects can devastate the local forests where there are no natural predators or defenses to stop them. In some states, regulations and quarantines have been instituted to restrict the movement of firewood.


Be sure to have your chimney inspected before using your fireplace. It is critical to have your chimney inspected on an annual basis as specified by the National Fire Protection Guidelines which say, “Chimneys should be inspected on an annual basis and swept if necessary.” To find a qualified CSIA Certified Chimney Sweep, make sure to go through the Chimney Safety Institute of America.