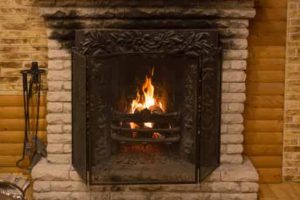
What is a prefab fireplace?
 A prefabricated fireplace goes by several names–a “prefab” or “factory-built fireplace.” Another term would be “decorative heating appliance.”
These fireplace systems are manufactured in a factory, assembled at the customer’s home and installed into the wood framing of the chimney structure.
This type of fireplace is tested to the U.L. 127 Standard in the Underwriters Laboratory or other approved agency. This approval is called a “listing.”
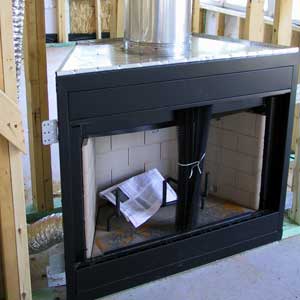
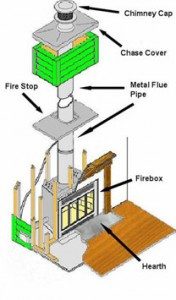
The system is comprised of a metal firebox with either refractory panels or metal panels, a metal pipe, a metal chase cover, and a chimney cap, all housed in a chimney structure. Outside the home and above the roofline, the chimney structure (also referred to as a “chase”) is nothing more than wood framing and stucco. The metal pipe is inside the chase. In some cases, the pipe will be exposed above the roof.
Here in San Diego, prefab fireplaces have been around since the late 1960s or early 1970s. Because of the high cost of labor for building masonry fireplaces, contractors started installing prefabricated fireplace systems. Most tract homes built since the 1980s have prefab fireplaces.
Home builders and contractors make a prefab fireplace look like a masonry fireplace. Most homeowners cannot tell the difference and don’t even realize that it’s not a masonry fireplace.
What is a U.L. listing and why is that important?
The manufacturer goes through expensive and extensive testing through the Underwriters Laboratory or other approved agency. The approval, or “listing,” involves testing the system with the specific components of the system.
This is important to know because if any of the components are changed out with a component not tested with the system, it voids out the listing on the entire system. That means that if there’s ever damage caused by the fireplace due to a non-manufacturer’s component, the liability is removed from the manufacturer. The fireplace professional who installed the non-manufacturer’s part may then be held liable.
For safety and liability reasons, these prefab fireplace systems should not be modified against the manufacturer’s specifications!
What is the difference between a prefab fireplace and a masonry fireplace?
There’s a big difference between these two types of fireplace systems.
A masonry system is built on-site, brick by brick. These are well-built systems made with bricks and mortar. Masonry fireplace systems built after the 1940s also have a pipe known as a flue lining.
Here in San Diego, the pipe in masonry chimneys is typically made from terra cotta (clay) or pumice. If masonry chimneys are maintained properly, they can last more than a hundred years.
How can I tell if I have a prefab fireplace?
 The exterior chimney structure is typically made of stucco or siding. A masonry chimney will usually have bricks and mortar.
The flue pipe in a prefab is made from metal, either a double wall or triple wall pipe. Looking from the prefab firebox up into the flue, the smooth metal pipe can be seen.
The average homeowner cannot tell if they have a masonry or prefab fireplace. A qualified chimney professional trained in prefab fireplaces or a CSIA Certified Chimney Sweep will be able to inform the homeowner what type of system it is.
How can I know what the manufacturer and model are of my prefab fireplace?
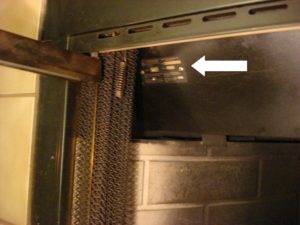 Prefab fireplaces will have what we refer to as a “tag.” This is a metal plate, sometimes the size of a business card, and it will be placed somewhere inside the firebox. The tag will list the name of the manufacturer and the model number.
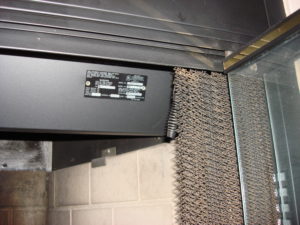
In new homes, the contractor may have left the operating/installation instructions for the new homeowner that will list the manufacturer and model number. Homeowners should keep track of this important information.
How do I use my prefab fireplace?
Most prefab fireplaces can be used with artificial gas logs, prefabricated logs (such as Duraflames) or well-seasoned wood. Reading the operating instructions is helpful for homeowners to know how to safely operate their fireplace.
Also, prefab fireplaces cannot have big fires or very hot fires in them. If you do, you can crack the fragile refractory panels inside the firebox and those panels can be very expensive to replace. For that reason, we recommend that prefab fireplaces should be limited to small fires. Certainly, you can burn wood in most prefabs but never any larger or hotter than what you would get if you’re burning just one Duraflame log.
What is a refractory panel?
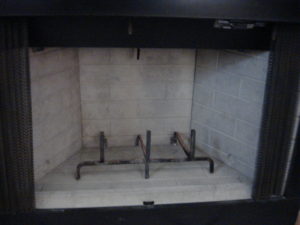 In most prefab fireboxes, the systems will have four refractory panels–two sides, a back, and the floor–inside the firebox where you make the fire. These panels stand up about two feet tall. They are made from refractory cement, stamped to look like bricks but they’re not really bricks.
These panels protect the metal firebox by lowering the temperature to the metal. Behind the metal firebox is the wooden structure of the chimney chase.
Without refractory panels or with damaged panels, too much heat can get to the metal firebox behind the panels. This can then heat the wood framing behind the firebox. In addition, if the metal firebox gets too hot, the metal firebox may warp and new refractory panels will no longer fit.
Burning too hot of a fire will crack the refractory panels.
 Usually, the back and floor panels get cracked first because they get most of the heat of the fire. Hairline cracks should be monitored. The panels must be replaced if any cracks are wider than what you could fit the edge of a dime into.
Cracks in the refractory panels cause a potentially dangerous situation since they have lost their insulating ability and may allow the transfer of heat to combustible materials.
Most manufacturers state that if there are cracks in the panels, the panels cannot be repaired or patched. The panels have to be replaced.
These refractory panels are the Achilles Heel of the system but with proper usage, by not having large fires, you can prevent cracks from occurring. Cracked refractory panels should only be replaced with manufacturer’s panels. Using after-market parts (also known as “universal panels” or “non-factory parts” or “cut-to-fit panels”) may void out the U.L. listing on the prefab system.
Remember, these systems are not intended for heating your home. Only ambiance. In fact, if you’re getting a lot of heat out of your prefab fireplace, then you’re probably having too large of a fire.
What is a chase cover?
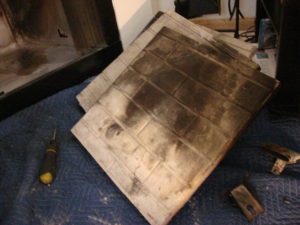
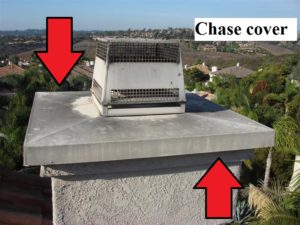 The chase cover sits on top of the chase (chimney structure). It is a flat, horizontal piece of sheet metal that sits on top of the chimney structure. The chase cover has a large hole in it where the pipe comes through the cover and attaches to the chimney cap.
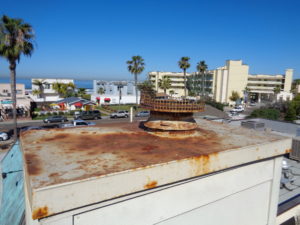
It’s not uncommon for chase covers to rust when rainwater pools on top of the cover. The rust eats through the metal chase cover, creating a hole. Rainwater can then enter the chase, landing on top of the firebox which will rust out the entire system. At that point in time, the entire system will need to be replaced.
Why do I hear water dripping when it rains?
When you hear water dripping on metal, call a chimney professional immediately. That sound is likely where water is coming through a rusted-out chase cover. If you wait too long, the water landing on the firebox inside the chase will rust out the system, creating a very expensive replacement of the entire prefab system.
Having the prefab fireplace inspected on an annual basis by a qualified chimney professional will prevent this issue, ultimately saving you money by fixing the problems before damage occurs.
What are the common problems with prefab fireplaces?
The most common problems we see with prefab fireplaces are cracked refractory panels, leaking chase covers, rusted out fireboxes and rusted out caps.
Preventing these issues is easy by having smaller fires and having your chimney inspected on an annual basis by a qualified chimney professional to prevent problems before they happen.
I don’t use my fireplace. Do I still have to have it inspected every year?
A prefab fireplace that is never used can still deteriorate.
We find that here, in San Diego County, prefab fireplaces in homes near the ocean deteriorate much faster than in other areas of the county. The salt air from the ocean, even as much as 5-10 miles inland, can rust out a prefab fireplace. The lifespan of a prefab fireplace can be cut in half because of its proximity to the ocean.
This makes it even more critical to have a prefab chimney inspected on an annual basis to catch problems with the system before the problem gets too extensive and the entire system has to be replaced.
Where can I find parts for my prefab fireplace?
Most manufacturers of prefab fireplaces only sell parts to chimney professionals and not directly to homeowners. After determining the manufacturer and model of the system, a chimney professional can contact the manufacturer for replacement parts such as refractory panels, fireplace glass doors, and chimney caps. Installing components that are not from the manufacturer will void out the listing on the system and, in the event of fire damage caused by the fireplace, it can create liability issues because the installer modified the system against the manufacturer’s specification and the listing.
How long do prefab fireplaces last?
There’s a wide variation of professional opinions on how long prefab fireplaces last.
Certain factors can decrease the life span, such as not maintaining the system, the proximity to the ocean, weather conditions or over-firing the system. Having the prefab system inspected on an annual basis, whether the system is or isn’t used, is the best way to extend the life span of a prefab fireplace.
 Many manufacturers and chimney professionals will say that prefab fireplaces can last between 20-30 years. In our professional experience, here in San Diego, we’ve seen some systems needing replacement after only 15 years while at the same time, we’ve seen well-maintained systems that are over 40 years old and still operational.
How do I replace my prefab fireplace?
Replacing a prefab fireplace is not something the average homeowner should attempt. In fact, we advise only a licensed chimney professional specifically trained in prefabs should replace the system. If a prefab fireplace is not installed properly, it can create an extremely dangerous and deadly situation for the homeowner.
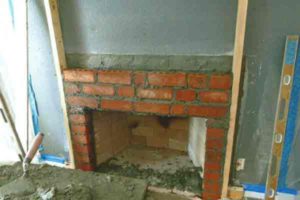
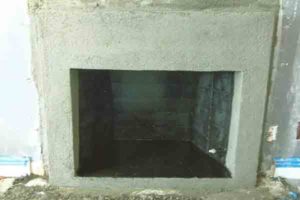
When a prefab fireplace needs to be replaced, the existing chimney chase (the chimney structure) can still be used. Only the “innards” of the prefab system need to be replaced–firebox, flue pipe, chase cover, and cap.
Unfortunately, the firebox opening for the new system won’t necessarily be the same size opening as the old system which means that the facade may be affected around the firebox opening.
In most cases, the facade must be removed first so that the prefab system can be removed and replaced. For this reason, we recommend that the prefab fireplace be replaced at the same time as updating the facade.
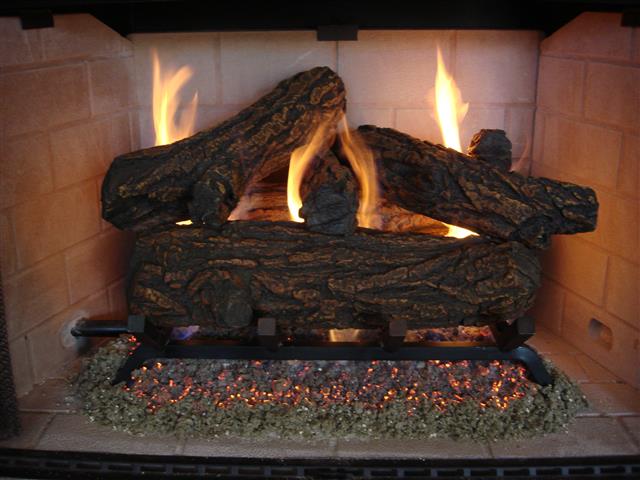
Can I burn gas logs in my prefab fireplace?
The best way to know what you can and cannot burn in your prefab fireplace is to read the manufacturer’s operating instructions for your specific manufacturer and model of your system. In most cases, you can burn wood, prefabricated logs (such as Duraflame logs) or artificial gas logs.
Sometimes the tag will also indicate what types of fuel can be burned.
Glass doors open or glass doors closed?
Glass doors must be in a fully OPEN position when you have a fire in the fireplace.
If glass doors are partially open, the gases and smoke may be drawn into the room through a “secondary chimney effect” so keep the doors fully open.
If you close the glass doors while you have an active fire, the glass can implode or explode. Here’s a youtube video from Kelly Ripa, a morning talk show host, whose glass doors exploded on her because they had the doors closed:
http://https://www.youtube.com/watch?v=7R7IvsZ0ALc
Of course, before you go to bed at night, once the fire has died down, close the glass doors. This will prevent embers from coming into the room while you’re sleeping.
Glass doors serve the purpose of preventing heat loss from your home especially when you have your damper locked open as in the case of artificial gas logs. Unfortunately, in some cases, glass doors are no longer available, especially in a case where you have an older prefab fireplace. In that case, do not put on any glass doors other than the doors specifically listed for the manufacturer and model of your prefab system. IMPORTANT: Putting on any other glass doors may block the air-cooling louvers and overheat the system.
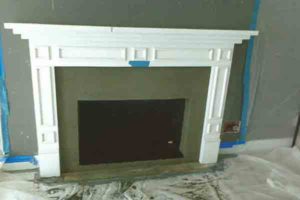
How can I remodel my prefab fireplace?
We are finding that many homeowners who remodel the fireplace by installing a new facade don’t realize that the prefab fireplace may already be at the end of its life span. These facades can be very expensive.
When the prefab fireplace has to be replaced, the facade may have to be removed. For that reason, we recommend timing the remodel of a new facade at the same time that a new prefab fireplace is installed.
First things first, always have your prefab fireplace inspected and maintained by a CSIA Certified Chimney Sweep on an annual basis so you can safely enjoy your fireplace and get the most amount of life span out of your system.
Special thanks to Pat and Bernie Lopez of Burnie’s Fireplace Services, nationally-renowned experts in factory-built fireplaces, for their valuable input in this blog post.
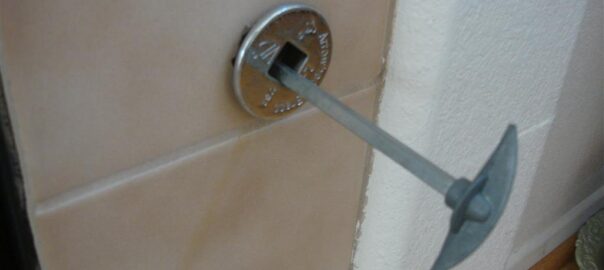
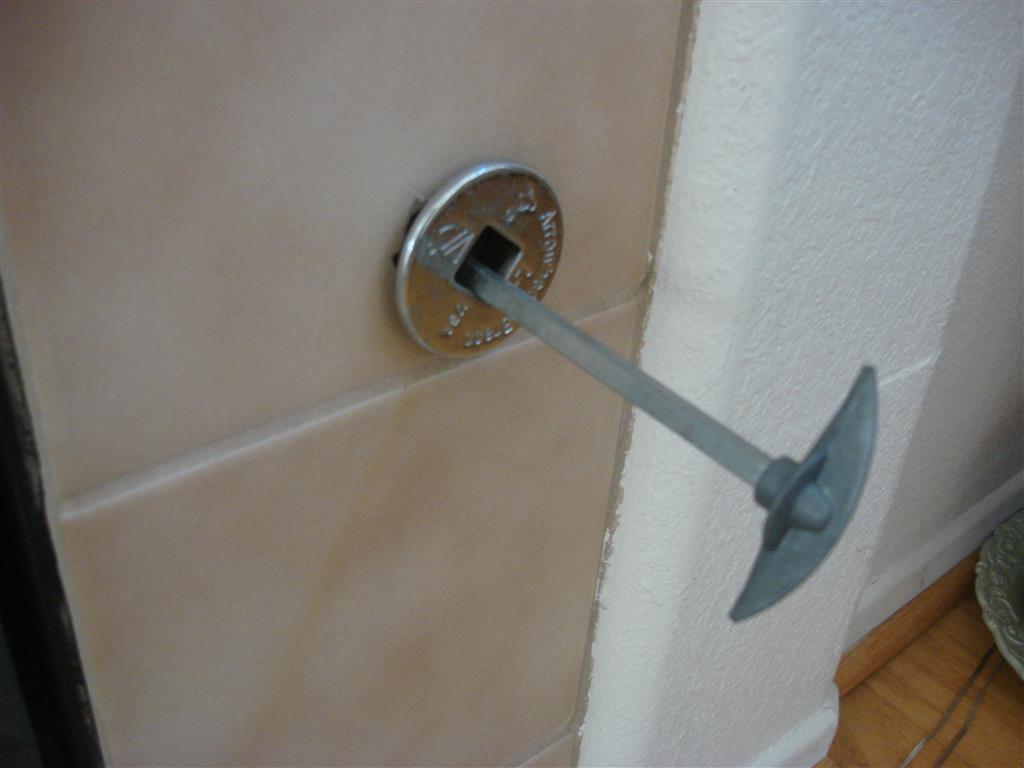
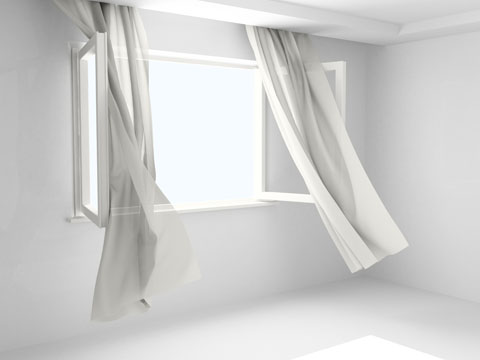 Fireplace dampers are an important component of your fireplace system and are often overlooked. Dampers serve the critical purpose of closing off the chimney when the fireplace is not in use. It’s an energy efficiency device, saving you money by preventing the loss of heat during the winter and preventing the loss of air conditioning during the summer. An open or a missing damper is like having an open window all the time.
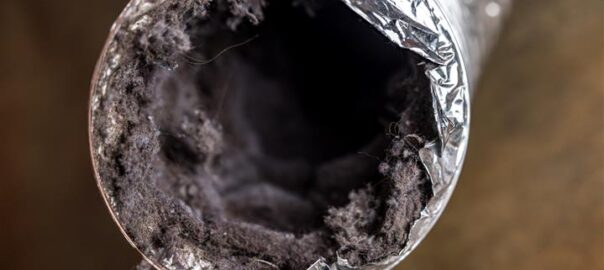
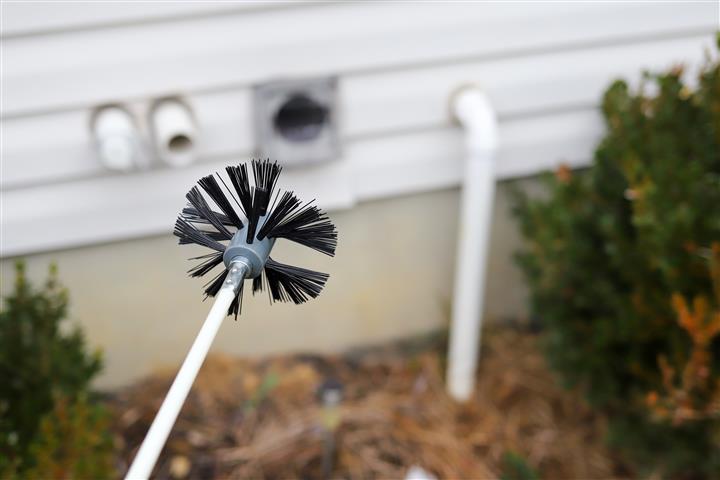


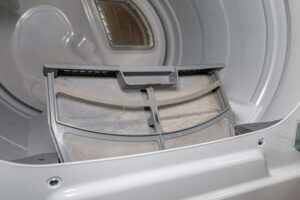
 One of the simplest yet most neglected maintenance tasks in the home has to do with your clothes dryer. Failing to do this simple task can sometimes have deadly results.
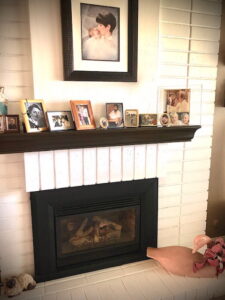
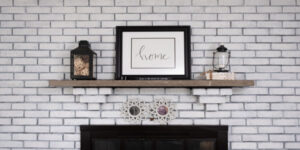 It is said that the eyes are the window to the soul. I would say that the fireplace is the soul of the home. Homeowners make a statement by what important items they place on the fireplace mantel.
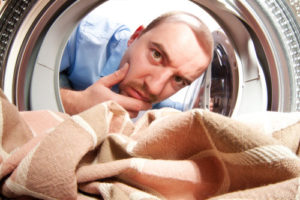 A dryer fire is much more common than you think.
 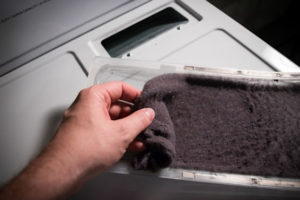 • Clean out the lint screen after every load of laundry.
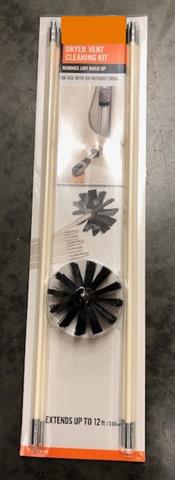
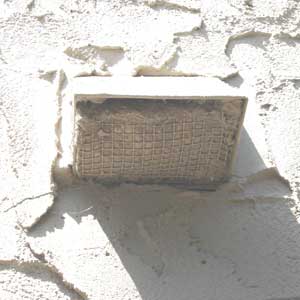 • Never have a screen where the dryer vent exhausts out. The screen will prevent animals from entering the dryer vent but the screen plugs up easily with lint. Instead, use a dryer damper or flapper.
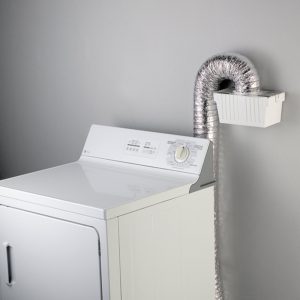
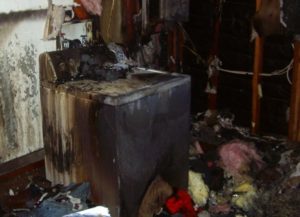 • Cleaning out your dryer vent is only one side of the issue. A dryer fire can also be caused by the clothes dryer itself. The paper and lint accumulation inside the dryer under the drum is typically where the dryer fire occurs. For that reason, hire a professional appliance technician to clean out the inside of the dryer once or twice a year, depending on your laundry habits. Simply cleaning the lint screen isn’t enough because the paper and lint can get past the lint screen and land inside the dryer. The only way to remove that lint is to open up the dryer.
 As professional chimney sweeps, there’s a common issue that we’ve been running into more and more during the past few years.
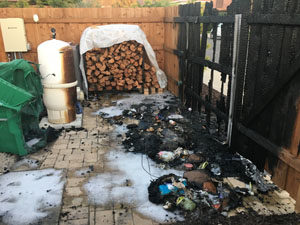 I had an interesting conversation with a caller recently. She had emptied her ashes from her fireplace, placed them in her outside trash can and left to run some errands. What she hadn’t realized was that the embers were still hot even though it had been a few days since her last fire. A neighbor happened to drive by and saw the entire fence was on fire. He called the fire department who miraculously saved the house.
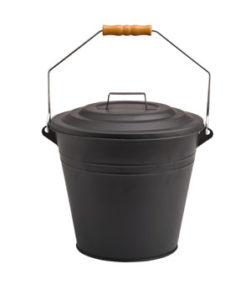 • Ash buckets specifically designed for this purpose can be purchased from Amazon, big box hardware stores or from your local fireplace store. The ash bucket should be made out of metal, have a tight-fitting lid with a carrying handle and ideally should have a double bottom. Many come with an ash shovel.