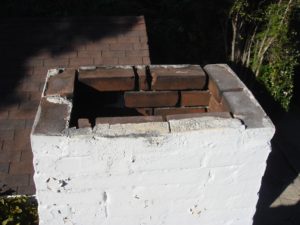
 As a chimney sweep, the most important part of a chimney that we inspect is the flue lining. In many older homes, there is no flue lining. This type of chimney system is referred to as an unlined chimney. According to the Chimney Safety Institute of America, “Never use a chimney that does not have a liner…”
What is an unlined chimney?
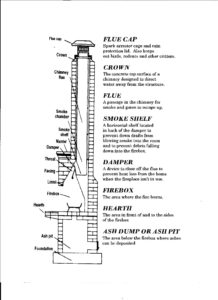
Simply stated, an unlined chimney is a chimney without a flue lining. The flue lining is a pipe that can be made from terra cotta, pumice or stainless steel. The flue lining should go from the very top of the chimney down to the bottom, to the smoke chamber above the firebox.
Depending on the region of the United States where you live and what building codes were in place at the time the chimney was built, flue linings have been required since the early 1900’s. However, here in San Diego, we see unlined chimneys as late as the 1950’s. In the 2016 California Residential Code, Chapter 10 – R1003.11 it states specifically, “Masonry chimneys shall be lined.”
In the 1940’s and again in the 1980’s, the National Bureau of Standards performed tests on unlined chimneys. After testing for just 3½ hours, the woodwork adjacent to the unlined chimney caught on fire. The test was abandoned at that point because the unlined chimney failed to perform its function. The researchers concluded that “building a chimney without a lining was little less than criminal.”
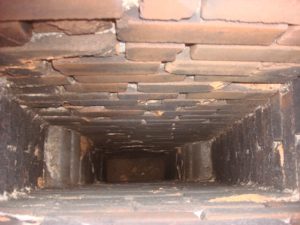
The mortar joints between the bricks in an unlined chimney also fail. Many masons in the early years of building unlined chimneys added a lot of sand to the mortar. The mortar is like the glue that holds the bricks together. As the mortar in the joints gets older and deteriorated, the mortar joints fail, becoming sand. This creates gaps and holes in the mortar joints inside the chimney. These gaps allow heat, gases (such as carbon monoxide) and embers to penetrate and transfer to surrounding combustibles such as the wooden infrastructure of the home.
Without a lining, an unlined chimney “can no longer contain the elements of combustion.” When we see unlined chimneys in our customer’s homes, we recommend not to use the chimney until the chimney has been repaired.
How do you know if you have an unlined chimney?
Perhaps you had a home inspection done when you purchased your home. What most home buyers don’t realize is that home inspectors do not inspect flue linings. You cannot depend on a home inspection to determine if your chimney is lined or unlined. This is why it is essential to get a separate chimney inspection by a CSIA Certified Chimney Sweep BEFORE you purchase a home. Here’s how to find a CSIA Certified Chimney Sweep.
A CSIA Certified Chimney Sweep will not only be able to determine if your chimney is lined or unlined, but will also be able to inspect the condition of the flue lining if you have one. Again, the flue lining is the most critical component of your entire chimney system.
How to repair an unlined chimney
Assuming the chimney is structurally sound, the chimney can be relined, although new methods may be found in various parts of the United States.
Relining a chimney is where a metal pipe is installed inside the chimney structure to become the new flue lining. In most cases with these older systems, the firebox is rebuilt at the same time. Typically a top-mount damper is installed along with a flue cap.
Prices for relines vary from region to region. Chimneys in poor condition may also require additional extensive repair before relining.
If the unlined chimney is not structurally sound, a reline may not be a consideration. In that case, tearing down the chimney and rebuilding it with either a new masonry chimney or installing a prefab system would be the only other option.
First things first, have your chimney flue lining inspected by a CSIA Certified Chimney Sweep to make sure you don’t have an unlined chimney!
[Photo credits: Rick Pocock]

 away from the structure. A crown can also be referred to as a “wash” or a “splay.” A cracked crown will allow moisture to get into the chimney structure, eventually creating cracks in the chimney structure.
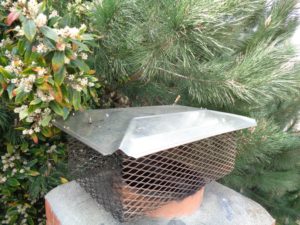 How many times do we, as chimney sweeps, advise a customer to contact someone that does tree removal services, a landscaper or a gardener? More often than you think!
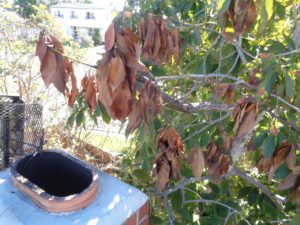 3) Trees too close to the house are a gateway for
 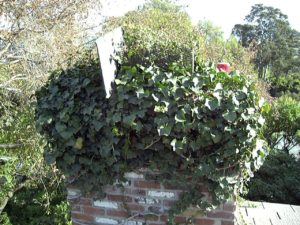 7) Ivy and other vine-like vegetation growing on the chimney may look beautiful but will damage the masonry and will leave permanent unsightly marks on the chimney after removal. Also, ivy can eventually travel and grow inside the chimney, creating a fire hazard.
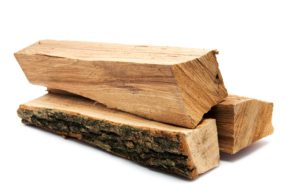
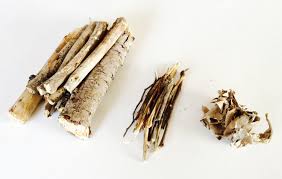
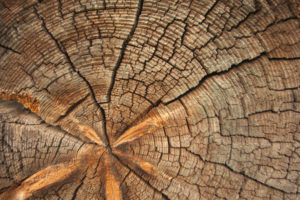 Here are some interesting facts that will help you season your firewood for your fireplace or stove. Seasoning your wood is critical not only for safer fires, but to reduce creosote buildup in your fireplace or stove flue pipe and to reduce pollutants into the atmosphere. This is the second post in a series of three that will explain how to
 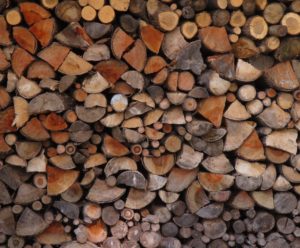 Here are some interesting facts that will help you purchase firewood for your fireplace or stove. If you do it right, you will save money while keeping your family safe and toasty. This is the first post in a series of three that will explain how to properly purchase,
  Many people think that the sole reason for a chimney cap is to keep the embers from starting the roof on fire; however, there are so many other benefits to a chimney cap, even during the hot summer months.
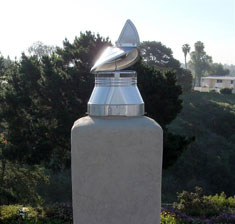
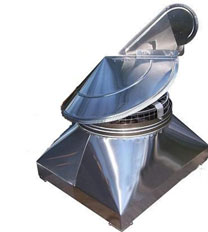
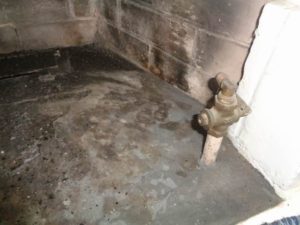 This occurs more often than you think. Upon inspection of a fireplace, we find the gas valve for the fireplace is located INSIDE the firebox. The fact of the matter is, if the valve is located inside the firebox, then the valve has to be removed, capped off and relocated.
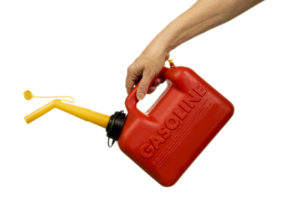 True story: When I was growing up, we lived next door to some wonderful neighbors. John (not his real name) was a California Highway Patrolman and we highly respected him. His wife became best friends with my mother. My brothers and I became friends with their four sons. One winter, John was trying to get a fire started with green wood. Because the wood had a high moisture content, he couldn’t get the fire started. John went and got a gas can and poured some gas on the wood, not knowing that there was smoldering wood below the grate from the previous night’s fire. The fire instantly exploded. John jumped back and spilled the gas can on top of himself which instantly lit him on fire. John was burned over 75% of his body and almost died. He was in the hospital for months recovering and he suffered a great deal of pain from those burns for the remaining 45 years of his life. This event had a major impact on me and every time I see or hear about someone pouring gas on a fire to get it started, I instantly think of John. If this doesn’t inspire you to be careful and
 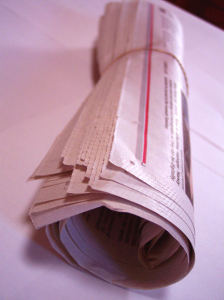 Junk mail, newspapers, magazines, and trash (such as cardboard, pizza boxes and Styrofoam) may contain plastic, chemicals, glues as well as ink that can be toxic when burned.