
There’s a lot to know in how to purchase, season and store firewood, not only to keep you safe but to save money. This is the third post in a series of three that will explain how to purchase, season and store your firewood.
1) Cut firewood to the proper size logs you will be using. A typical length of wood for most fireplaces and stoves is 16″.
2) Cut firewood at least 3″ shorter than the firebox width. It is better to have wood too short than too long.
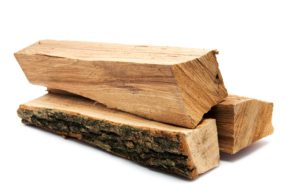
3) Always split the wood before storing it to reduce the time to season the wood.
4) Split firewood in various sizes for a variety of uses–as kindling to start a fire or larger in diameter for maintaining the fire. Cut wood in a range between 3″ to 6″ in diameter.
5) If possible, split the wood into triangles. The wood stacks better and won’t roll off like they would with round logs.
6) Stack firewood away from the house to reduce the chance of insects, mice, rats and other critters from your home. Ideally, the wood stack should be at least thirty feet away from your home.
7) Do not expose firewood to the rain or snow or it will “re-hydrate” and will no longer be seasoned. When there’s the threat of rain or snow, cover the wood with a large tarp or plastic sheets or old steel roofing.
8) Firewood will not season if it is continuously and completely covered all the time. Adequate airflow is critical to allow wood to season. Wind and sun will help to season the wood. Put the wood stack in an area with the most amount of exposure to the wind and sun.
9) When the moisture leaves the wood, the firewood may shrink as much as 6%-8%.
10) Do not stack firewood taller than four feet high or the stack will become unstable. In addition, stacking wood exactly four feet high makes it easier to determine how many cords you have.
11) Stack firewood with the bark side up. In case of rain, the bark will help to drain off the water from the wood.
12) Arrange firewood so it is neatly stacked, parallel and aligned.
13) Do not stack firewood directly on the ground because the wood will absorb moisture from the ground covering, will create rot and/or mold, and will decrease airflow. Instead, raise the wood off the ground, as on pallets or railroad ties.
14) Place your wood stacks on relatively level ground if possible to reduce the chances of collapse. Support each side of the wood stack to avoid accidents from falling wood. If you don’t use a wood rack, you can support one side of the stack with a tree on one side and posts on the other side.
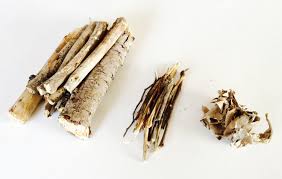
15) Wood can be divided into three sizes for wood burning: Tinder (about the size of a pencil lead), kindling (no thicker than your thumb), and fuel, about as thick as your wrist. Stack your woodpile into all three of these sizes.
16) Tinder consists of the dead twigs from the lower branches of trees and shrubs. It should snap off easily when bent and should be no shorter than your outstretched hand and enough to fill a circle made with your hands for one night’s fire.
17) Look for kindling from branches that are dead or down. Kindling should be about as long as from your elbow to your fingertips fire and you should have enough for a generous armload for one-night’s fire.
18) Fuel should be about as long as your arm and you should have a stack about as high as your knee for one night’s fire.
BONUS TIP: A little-known but efficient way to burn a fire is called an “Upside Down Burn.” This may take a little more time to set up but will give you a longer burning and cleaner burning fire. This method places larger pieces at the bottom and smaller wood pieces on top, placing just kindling at the very top. Each layer of wood is smaller than the layer below it. An added benefit is that this fire burning method will also create less creosote buildup in your chimney. [Video credit to the Chimney Safety Institute of America]