There’s nothing better than a warm fireplace on a cold evening. If you haven’t got one yet you are most definitely missing out! Here are 50 quick and simple tips that will help you safely enjoy that cozy fire even more.
IMPORTANT SAFETY TIPS
1. For an open fireplace, the glass doors must be in a fully open position. Once the fire has died out, close the glass doors before you go to bed at night.
2. Always make sure that the fire screen in front of the fireplace is closed when the fireplace is in use. Even when the fireplace is not in use, keep the fire screen closed to discourage pets from going into the firebox. (Cats have been known to use the fireplace as a litter box.)
3. Never leave a fire in the fireplace unattended, especially when children and pets are present.
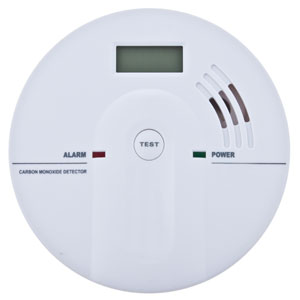 4. Install smoke and carbon monoxide detectors in your home, especially close to the fireplace as well as near bedrooms and in the kitchen. Make sure to test them at least twice a year.
5. According to the Chimney Safety Institute of America, homes should have a minimum of two 5 lb ABC fire extinguishers. There should be one fire extinguisher per floor of a house and the fire extinguishers should be visible and accessible. A fire extinguisher should be close at hand when the fireplace is in use.
6. Never use kerosene, lighter fluid or gasoline to start your fire.
7. Keep combustible materials (like knickknacks, newspapers, firewood and Christmas trees) away from the firebox opening. This includes items hung from the mantel, like Christmas stockings and garland.
8. Inspect your landscaping near the chimney. Trees and vines should be kept a minimum of 10 feet away from the top of the chimney.
FIREWOOD AND ARTIFICIAL FIRE LOGS (SUCH AS DURAFLAME)
9. Be sure your firewood is aged and kept dry from the rain or snow.
 10. Hardwoods should be aged a minimum of one year while softwoods should be aged a minimum of six months. The moisture in firewood should be between 15%-20%. Aged and dried wood will provide you with more efficient fires, fewer smoking problems, and less flammable creosote build-up in the chimney.
11. Do not burn construction scraps or wood that have been chemically treated, such as plywood, paneling or particleboard. In addition, don’t burn paper with colored ink, cardboard, Christmas wrapping paper, plastics, fabrics made from synthetic materials, or junk mail. The chemicals can be toxic when burned.
12. To easily start a fire, use fat wood or fire starters if you don’t have a log lighter.
13. Buy your wood in the spring or summer to allow it to dry out before the burning season.
14. A cord of wood is 4 feet x 4 feet x 8 feet. A rick of wood is one third the volume of a cord of wood. A truck-load of wood would be dependent on the size of the truck bed and is not an easy way to determine how much wood you’re actually buying. A truck-load could mean anything from a short-bed pick-up truck holding 1/5 cord to a pulpwood truck that can hold four cords.
15. A cord of wood is a legal unit of measure. If you buy a cord of wood, have the wood cut to burning length, split and stacked and not just dumped in your driveway. Although you may pay more, you will know for certain that you weren’t cheated and that the wood will be aged in time for the burning season.
16. Stack wood on top of a pallet instead of directly on the ground to avoid pests and mold in your firewood.
 17. If you’re burning artificial fire logs (like Duraflame), do not place wood on top or below the artificial fire log.
18. Never poke or break open an artificial fire log while it’s burning.
19. Only burn one artificial fire log at a time.
20. Do not cook food over artificial fire logs because of the chemicals in this product.
21. Never burn artificial fire logs in free-standing stoves or stove inserts.
SMOKING PROBLEMS
22. During cold weather, always prime your flue before lighting your fire to prevent smoking problems, especially if you commonly have a smoking problem at the beginning of a fire.
23. Airtight homes are more prone to smoking problems. This is especially true in newer homes or homes that have been retrofitted with new windows. If this is the case, crack open a window close to the fireplace.
24. Avoid having the heater/furnace or air conditioning on at the same time as the fireplace especially if the air intake register for the furnace is close to or in the same room as the fireplace. During a fire, you may lose the draw on the fireplace because the furnace can pull smoke and gases down the chimney and back into the living area.
25. Always use a fire grate in the fireplace. This allows airflow under the fire to help in the combustion process and will give you a better fire.
26. Place your firewood on the fire grate close to the back wall to prevent smoking problems.
DAMPER
27. Always check to make sure your damper is fully open before you light the fire.
28. Do you always forget which way your damper is open? Put a note on the underside of your mantel that says which way the damper is open. If you don’t remember which way the damper opens, you’ll remember where to look to find out!
29. Close your damper when you’re not using your fireplace so you won’t lose heat during the winter and air conditioning during the summer. An open damper is like having an open window.
30. If your existing damper is broken or non-existent, and if you burn wood, consider installing a top sealing damper to prevent heat loss from the home.
31. If you have gas logs in an open fireplace, the damper must be locked in a fully open position.
CLEANING OUT THE FIREPLACE
32. You don’t have to clean out the fireplace after every use. In fact, a healthy bed of ashes below the grate can actually be beneficial. Once the ashes reach the bottom of the grate, the ashes should be spread out or removed since it’s important to have good airflow from under the grate.
33. Wait at least 72 hours after your last fire before cleaning out the ashes in your firebox.
34. When you’re cleaning out the ash and debris from the fireplace, spread slightly damp, used coffee grounds over the ashes before you clean it out. It’ll prevent the ash from becoming airborne and make it easier to clean out.
35. Wear a mask while cleaning out the firebox to avoid breathing fly-away soot and ash.
36. Don’t use your home vacuum cleaner to vacuum the ashes from your fireplace. You stand the chance of ruining your vacuum cleaner. Also, household vacuum cleaners and shop vacs don’t have good enough filters so you run the risk of “dusting” your living room. Instead, use a small whisk broom and dustpan to remove the ashes from the fireplace.
37. Place ashes in a metal can with a lid. Make sure the can is not placed on a wood deck or patio afterward.
38. If you have artificial gas logs, it’s common to have a light sooting on the logs where the flames lick up over the logs. This is not a safety issue and is totally natural. Simply use a soft bristle brush (like a paintbrush) to dust off the soot. Never wash or scrub the artificial gas logs or you will remove the paint from the logs.
39. Don’t throw away used ashes. They have many beneficial uses, such as: providing necessary nutrients to gardens, composting, insect deterrents (snails and slugs), de-skunking a pet, shining your silver, controlling pond algae, melting ice, and even making soap.
CHIMNEY CAPS
 40. A chimney cap serves three main purposes: 1) will prevent embers from landing on your roof, your neighbor’s roof, your solar panels, your car and your landscaping ; 2) will prevent birds and other critters from entering your home through the chimney; and 3) can prevent water intrusion into your chimney which will deteriorate your chimney prematurely and will also extend the life of your damper.
41. If your home is located off of a canyon or hillside, your chimney may be more prone to smoking problems. A specially-designed windcap can minimize smoking problems in this case.
OTHER IMPORTANT INFORMATION TO KNOW
42. Pre-fab fireplaces, typically in condos and homes built after the 1980s, are intended more for ambiance and romance than for heat. In this type of fireplace, you should not have a fire any larger than what you would get if you are burning one artificial fire log, like Duraflame. Having large or overly hot fires in pre-fab fireplaces may cause damage to the fragile refractory panels inside the firebox and those panels are expensive to replace.
43. Consider a heat shield or fireback to protect the backwall of your fireplace. It will extend the life of the firebox.
44. Odor problems, or as I like to say “stinky chimneys,” can be caused by smoking problems, animals in the chimney, a dirty chimney, the type of fuel you’re burning (especially wood that is wet or not aged), the pressurization in your home, or rainwater in your chimney.
45. Reconsider mounting a TV above your fireplace. Heat and dust particulates aren’t good for electronics and doing this may void the TV manufacturer’s warranty.
46. If you’re buying a new home, have your chimney inspected by a CSIA Certified Chimney Sweep during the inspection period. If you have just bought a home, have the chimney inspected before using it for the first time. You never know what or how much the previous owner burned.
47. If you have a masonry chimney and you live in a region with a lot of rain or snow, consider weather sealing the masonry to prevent spalling and deterioration of the bricks and to avoid expensive masonry repairs later on.
48. Only use a CSIA Certified Chimney Sweep to inspect or sweep your chimney. To find a CSIA Certified Chimney Sweep, go to the website for the Chimney Safety Institute of America.
49. According to the National Fire Protection Association, chimneys should be inspected on an annual basis and swept if necessary.
50. To save money, do this important maintenance in the spring and summer when the rates are the lowest and when the schedule is less impacted.
Fireplaces are the best part of winter. Following these simple hints will give you the most enjoyment from a cozy fire.

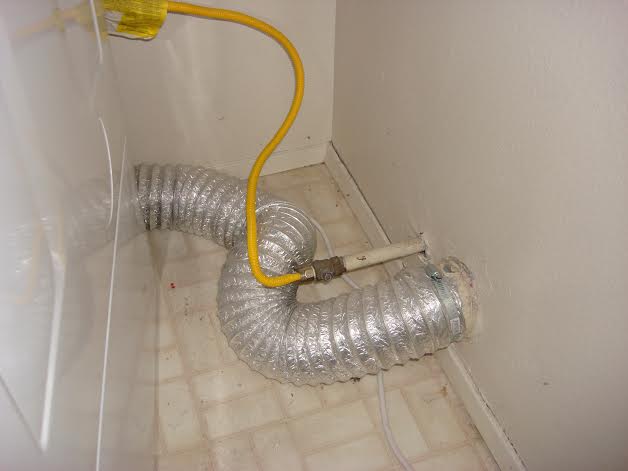
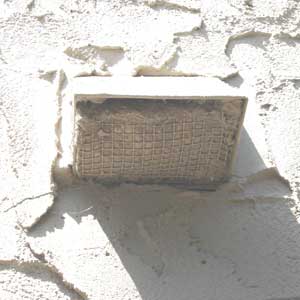 Although the screens are useful for keeping out rodents, the screens are actually against code because they tend to plug up with lint.